Showing posts with label cooking. Show all posts

Saturday, September 22, 2012

MasterChef Cookoff!


Today you get a 4 for 1 special.

My friends and I LOVE MasterChef with Gordon Ramsay. Last week was the finale, so to celebrate we had our own MasterChef cookoff! We drew randomly for one of four courses: Appetizer, Entreé, Side dish, and Dessert. Then we each drew 2 secret ingredients, and had the option to veto one of them. 

Katie drew appetizer and her ingredients were cheese and corn. She vetoed corn. 


Ryan drew dessert and I drew side dish, so naturally we switched. (For the sake of everyone else really) Ryan's side dish's secret ingredients were Beer and...he doesn't remember...He got beer and vetoed whatever else.

Mike drew entreé and his secret ingredients were tequila and chocolate. He, like Ryan, saw tequila and vetoed whatever else. (He wasn't about to make a molé)

My dessert secret ingredients were sweet potatoes and bacon. I vetoed bacon. 

The only rules were that it had to use your ingredient and you weren't allowed to copy a recipe word for word. You could use recipes as inspiration, but ultimately, it had to be original.

Once we picked our courses and ingredients we had a couple days to think about what we wanted to create. Creating and cooking our dishes was great, but eating the dishes was even better!! We all got to enjoy the fruits of our labor. And the finale of MasterChef of course!!! And that was great for us, but awesome for you because you get to enjoy the recipes that came of it! P.S Thank you to my friend Julian for his absolutely gorgeous photos of the dishes we created! (Don't worry, he got to eat in exchange for the photos. We dont starve our photographers here at S. Pres, Oh!)

Katie made Cream Cheese Jalepeño Poppers

Ryan made Beer Sliders


Mike made Tequila Marinated Pork Loin


I made Scalloped Sweet Potatoes


P.S, Check out Katie on her Uloop blog and her own personal blog: Conkerr the World

Makes 30

2 8oz packages of cream cheese
1 cup cheddar, shredded
1 lb. Bacon
2-3 stocks green onion, diced
3-4 cloves of garlic, diced
15 jalapenos

Dice up the bacon into small cubes about ¼ in. wide. Tip! Stick the bacon in the freezer for a little bit before you dice it so it wont slide around so much when you do so!


Cook the bacon in a pan over med-high until bacon starts to crisp and turn orange. Add the 3-4 cloves of diced garlic and immediately remove from heat. Another tip! To drain the bacon and garlic so you dont lose any pieces, place a paper towel over whatever you are using to collect the bacon grease and pour the contents of the pan into the paper towel to strain out the bacon and garlic! Place bacon and garlic in the refrigerator.

Pre-heat the oven to 360 degrees. Bring a pot of water to a boil. Add the peppers and allow  to boil briefly, about 3-4 minutes. This will soften them up and make it easy to cut them open and shell out the ribs and seeds. Pull out the peppers and cut them in half. Use a spoon to scrape out all of the white stuff and seeds. Be sure to rinse the peppers so no stray jalapeno seeds end up in the mix.

Mix together the cheese and cream cheese until well incorporated, then fold in the bacon/garlic mix. Add the green onions and mix the filling until everything is evenly distributed. 

Use a spoon to stuff the pepper shells. If you like, grate some thick slices of cheddar on top of the poppers. Place in the oven for 10-15 minutes, or until the cheddar is melted.


Beer Sliders by Ryan

Makes 18 sliders

2 lbs ground beef
2 cloves garlic, diced
1 cup of a 
strong heavy beer of your choice, preferably an IPA. (We used Arrogant Bastard from Stone Brewery)
1/2 onion, diced
Worcestershire sauce, to taste
BBQ sauce, to taste
1 bag of potato dinner rolls

Mix all the ingredients in a large bowl. You can add more beer if necessary, but if you can see the beer in the beef, you've added too much. Form the beef into small patties. Heat some oil in a pan and cook patties, covering with lid, flipping every couple of minutes. Cook to desired doneness. 


2-3 pork loins
1/2 cup tequila
1/4 cup olive oil, plus more for searing
3 cloves of garlic, crushed
1/4 bunch of cilantro
2 onions, cut into quarters
1 finger chili, sliced
2 limes, quartered
salt & pepper, to taste
3 tbsp Hot Salsa of your choice
chili powder, to taste


Cut a slit in the pork loins, an inch deep. Place in a Ziploc bag. Add the tequila, olive oil,  garlic, cilantro, onions, chili, limes, salt and pepper. Let it marinate in the fridge for at least 2 hours.

Preheat the oven to 375 degrees. Sear the marinated pork loins in 2 tbsps. of olive oil until lightly browned.
Transfer to a baking dish. Fill incisions with hot salsa. Bake in a preheated 375 degree oven for 15 minutes. Flip meat, sprinkle with chili powder and bake for another 15 minutes.
Remove from oven and let rest under foil for 15 minutes. Slice and serve!


5 medium sweet potatoes
1.5 cups of brown sugar, divided
2 tbsp cinnamon
1 tsp nutmeg
1 tsp ginger
3 8oz packages of cream cheese, softened (see the Tip below for how I soften cream cheese)
1.5 cups of powdered sugar,
5 tablespoons of milk
1/2 package of chopped pecans, optional

Grease a 9x14 baking dish and preheat the oven to 375˚. Tip! Once you turn on your oven, place your cream cheese in the wrapper on the stove top and flip occasionally. While your oven preheats, it will soften the cream cheese!

Peel the sweet potatoes and use the side of a cheese grater, or your own vegetable slicer to slice the sweet potatoes into thin strips.

Mix 1 cup of brown sugar, cinnamon, nutmeg, and ginger in a small bowl. 

Whisk the cream cheese with the powdered sugar until light in color. Separate half the mixture into another bowl and slowly fold in the milk to one of the mixtures. Whisk creating a thin cream cheese frosting.

Place a layer of sweet potato into the prepared baking sheet. Top with the brown sugar mixture and top with 1/2 of the thinner cream cheese frosting. Repeat these three steps one more time and top with a final layer of sweet potato. Top with the thicker cream cheese mixture.

Bake for 60 minutes or until the sweet potatoes are tender.

While baking, mix the pecans with 1/2 cup of brown sugar and a little more of the cinnamon. Sprinkle the pecans on top halfway through the baking. You can also mix the pecans throughout the layers before you bake if you would like.


Mmmm the layers!


I hope you enjoyed our homage to MasterChef!

Sunday, September 9, 2012

Pasta with Squash Cream Sauce


This is the easiest pasta sauce you will ever make. Simple and delicious, but a little messy! And with all the zucchini and squash I get at my job at the Life Lab this was the perfect recipe!


Ingredients

1 box of your favorite pasta (I like the fun shaped kind!)
olive oil
2 cups of squash or zucchini (about 1 large or 2 small),  shredded or finely chopped
garlic powder, salt & pepper, taste
1 cup of heavy cream


In a small pot, heat up some olive oil. Add the squash (or zucchini) and season with the garlic, salt, and pepper (and whatever seasonings you have around. I used my Italian seasoning mix) 

Bring squash to a light boil. Allow the squash to simmer in its own juices until it is light in color, about 10 minutes.

Meanwhile cook your pasta to package directions. 

Once your squash is almost translucent, whisk in the heavy cream and simmer for a couple more minutes.

Transfer your sauce to a food processor or blender (or use an emulsion blender) and blend until smooth. 

Return the sauce to the pot and simmer together for a few more minutes, stirring occasionally. 

Add the sauce to your drained pasta and thats that!


Mmmmmmm easy, healthy (kinda?) and delicious!

Monday, September 3, 2012

Homemade Chicken Noodle Soup

Ok. So dont hate me. I know it's been a while since I posted but I've been really busy! I started a new job, I moved into a new apartment, and I have been enjoying the last of August! But it's September now, so back to posting (hopefully!)


Last month, my old housemate Karla was very very sick. I jumped at the opportunity to make my famous homemade chicken noodle soup! A lot of people get nervous about making homemade soup because they think it has to take all day to make. NOT SO! This soup doesn't take very long at all (not counting the time to cook the chicken) and you dont even have to precook the noodles!

Ingredients
2 tbsp of minced garlic, divided
2 chicken breasts
2 sprigs of thyme
2 sprigs of rosemary
2 tbsp olive oil (just eyeball it! About 2 turns of the pan)
1/2 large onion, chopped
3 large carrots, diced
3 celery ribs, diced
2 48oz packages of chicken broth (about 1.5 cups separated)
1/2 package of extra wide egg noodles

Directions:

This first part is how I prefer to precook my chicken breasts. I promise you these will be the juiciest, most flavorful chicken you've ever made and you might not even want to put it into a soup it's that good! But if you dont want to do it this way, you can always cook your chicken another way ahead of time.

At least 4 hours before you serve (You could do this days ahead if you wanted to) place the chicken breasts in the bottom of your crockpot and season with salt, pepper, and 1 tablespoon of the garlic. Add the sprigs of thyme and rosemary (Throw the whole thing in there! Stems and all!) Pour the chicken broth over the chicken until the breasts are just covered (about 1.5 cups). Cook on low for 4 hours or high for 2.5 hours or until no longer pink. Pull apart the chicken with a fork. 

In a large pot heat up the olive oil. When hot, saute the onion. When the onion is almost clear, add the remaining garlic, carrots, and celery and saute for about 5 minutes or the celery and carrots are tender. If you cooked your chicken another way, add the sprigs of thyme and rosemary with the garlic, celery, and carrots. 

Add the remaining chicken broth to the pot and bring to a boil. Once the broth is boiling, add the egg noodles and cook according to package directions. 

Add the entire chicken mixture from the crockpot (rosemary, thyme, broth and all). Simmer for a few minutes more.

You can keep the sprigs in the soup (the leaves should have fallen off) to add more flavor as it sits, just make sure you dont serve them!

Let the deliciousness heal your body and soul!


Friday, August 3, 2012

Berry Vanilla Custard Pie


On Saturday my housemate and I watched Waitress starring Keri Russell and Nathan Fillion. This movie is great. Heartwarming, and sweet. Plus its got Nathan Fillion, and pies. Lots and lots of pies. So after some active convincing, my housemate and I got to work on our first ever pie entirely from scratch!


Ingredients:
Crust
Adapted from SimplyRecipes.com

1 1/4 cups all-purpose flour, plus extra for rolling
1/2 cup (1 stick) unsalted butter, very-cold, cut into 1/2 inch cubes
1/2 teaspoon salt
2 teaspoon sugar
3 to 4 Tbsp ice water

Filling

2 eggs
1/2 cup sugar plus 1 tablespoon for the berries
1/8 tsp salt
3 teaspoons of vanilla
1 1/3 cups milk
About 2 cups of frozen berries, (or 1/2 cup mashed) (I used strawberries and blackberries)

Preheat the oven to 400˚.

First combine flour, salt, and sugar in your food processor and pulse to mix.


Add the butter,


and pulse 6 to 8 times, until mixture resembles coarse meal, with pea size pieces of butter. The colder your butter, the better. You might even want to put it in the freezer for a half hour after you cut it into cubes to make sure it is extra cold.


Add ice water 1 Tbsp at a time, pulsing until mixture just begins to clump together. If you pinch some of the crumbly dough and it holds together, it's ready. If the dough doesn't hold together, add a little more water and pulse again. Note that too much water will make the crust tough. Remove dough from machine and place in a mound on a clean surface.


Work the dough just enough to form a disk, do not over-knead. You should be able to see little bits of butter in the dough. These small chunks of butter are what will allow the resulting crust to be flaky. Sprinkle a little flour around the disk. Wrap each disk in plastic wrap and refrigerate at least 1 hour, and up to 2 days.


Meanwhile, prepare the filling.

First heat up the milk and sugar in a saucepan until little bubbles form around the edges of the pan (called scalding). Be careful though! It could boil over in a split second!


While the milk is heating up, beat your eggs.


Also while the milk is heating up, you can mash your berries. I got these beautiful organic strawberries and blackberries from the farm at UCSC (where I just got hired!) and froze them the day I got them, waiting for the perfect opportunity to use them!


There. Beautiful.


Don't forget to add the extra tablespoon of sugar here when mashing your berries!

Now here is the tricky part (and what my housemate was most scared of). Once the milk has scalded, slowly pour it into the beaten eggs while whisking vigorously. If you aren’t careful, the beaten eggs can turn into scrambled eggs from the heat of the milk. If you let the milk run down the side of the bowl as you pour it into the eggs, it gives it just enough time to cool to increase your chances of a scramble free custard.


Whisk until it is lighter in color. Then add the vanilla.


Once your crust has chilled, remove it from the refrigerator. Let sit at room temperature for 5-10 minutes in order to soften just enough to make rolling out a bit easier. 


Roll out with whatever you have on hand on a lightly floured surface. (In the 3 years I’ve lived away from home, I have never had a rolling pin. I always use my handy dandy glassware and it works just fine!)

Do the best to get it into a 12-inch circle. You can eyeball it.


Carefully lift up the dough and lay it over your pan. Press the dough into the pan being careful not to tear the dough. (If you do, it's ok, you can smush it back together.


If you want your dough to be nice and flaky, brush an egg white onto the crust (this prevents the custard from sinking in)

Slowly pour the custard mixture into the prepared pie pan. Scoop the mashed berries into the pan. Use the tip of a knife to swirl and mix the berries into the custard. Don’t worry about a pretty design, the berries float to the top when the custard forms.


Bake for 30 minutes until crust is golden brown and a knife comes out with only the berries on it, and no custard.


And enjoy!


Saturday, July 28, 2012

Pumpkin Spice Snickerdoodles


So whenever I get the urge to bake, but I don't feel like going out and buying things, I usually make these cookies. I usually have all the ingredients! And for the holidays I always buy Pumpkin Pie Spice but I never end up using it all! So instead of putting cinnamon in my snickerdoodles, I use Pumpkin Pie Spice! It makes the house smell like Thanksgiving and it makes for delicious cookies!

Adapted from Kelsey's Apple a Day
 
Ingredients:
3 cups all-purpose flour 
2 tsp. baking powder
 
1/2 tsp. coarse salt
 
1 cup unsalted butter, softened
 
1 1/2 cup sugar (plus extra to roll the cookies in)

2 large eggs
 
3 tsp. pumpkin pie spice (plus extra
to roll the cookies in)
A splash of milk
First, preheat oven to 350 degrees F. 

Mix together flour, baking powder, salt, and pumpkin pie spice. 


Most snickerdoodles are just sugar cookies with cinnamon sugar on top. In my mind, why not incorporate the cinnamon (or in our case pumpkin pie spice) into the mix!
 
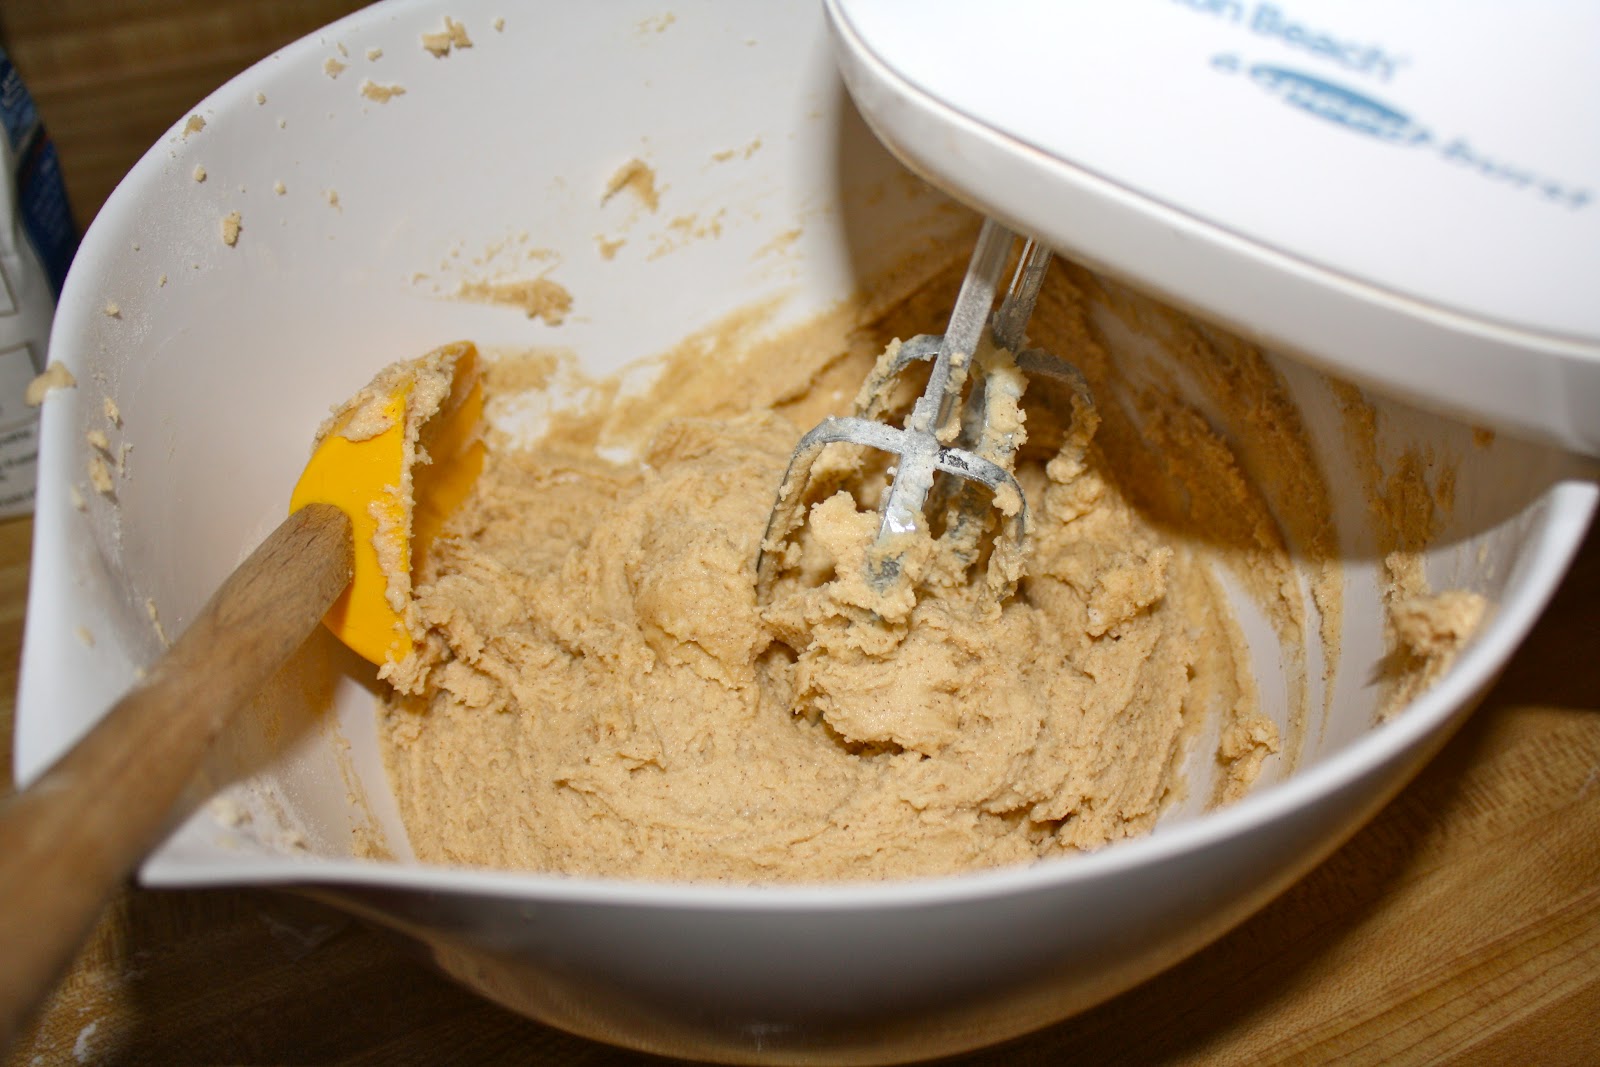
Next, put butter and sugar in a bowl and mix on medium speed with an electric mixer until pale and fluffy, about three minutes. 


Add the eggs,


and mix until it is a beautiful canary yellow.


Reduce speed to low and slowly add the dry ingredients.


At this point, if the mixture seems too thick, you can add the splash of milk. It makes for softer cookies. 
 
In a small bowl, stir together about a third of a cup of sugar and two tablespoons of Pumpkin Pie Spice.

Shape dough into balls (you should have about 20). Roll in pumpkin pie spice/sugar and flatten. Place on cookie sheet.

Bake cookies until edges are golden, about 12 minutes. 


Let cool and enjoy!


Sunday, July 15, 2012

Homemade Herb Bread


Homemade bread is amazing. Without a doubt. And yesterday they had fresh herbs at the farmers market at the base of campus (right next to my office!) I grabbed basil, thyme, rosemary, and sage and I knew that I wanted to bake it into some delicious bread!


To make herb bread, just take your favorite bread recipe and add your choice of herbs! This bread recipe is the one I used to make when I was a kid. I used to watch the show Zoom and they made this bread on the show and I was hooked for weeks! I was so amazed when I was still able to find it online!

Adapted from PBS Kids:

Ingredients:

1 cup white (or wheat) flour (and a little extra for kneading)
2 cups bread flour
1 cup hot water
1 package active dry yeast
3 tablespoons sugar
1 tablespoon salt
3 tablespoons vegetable oil

A splash of milk
1 gallon size resealable plastic baggie


Note: These measurements are for one loaf of bread. For the tutorial below, I doubled my recipe because I was making two types of Herb Bread.

To make Herb Bread, we are just going to add the types of seasoning we want to our bread. I made Rosemary/Thyme bread and Basil/Garlic bread but honestly you could add anything really. Even rasins and cinnamon if you want a sweeter bread, or even honey and oats for a honey oat bread!

Here are my measurements (you can just eyeball it really)

For the Rosemary/Thyme bread:

3 sprigs of rosemary leaves, loosely chopped
2 sprigs of thyme leaves

For the Basil/Garlic Bread
1/2 cup chopped basil
1 clove (2 teaspoons) of minced garlic

First, preheat your oven to 375 degrees.

Then mix 1 cup of bread flour, the packet of yeast, sugar and hot water in the sealable plastic bag.


Now get ready for the fun part. Let most of the air out of the bag, close it, and smoosh (yes, smoosh) the bag with your fingers to mix the ingredients.


My housemate Osang is a fantastic smoosher!
Then let the bag rest and watch the magic happen.


After about 10 minutes, the mixture will start to bubble and the bag will expand.


Meanwhile in a separate bowl, add the milk, the other cup of bread flour, salt, oil, and your herbs.


And mix together.


Add this mixture to your bag.


Get ready for Round 2 of Smooshing!


Open the bag and add the 1 cup of white (or wheat) flour. Reseal the bag and enjoy your last round of smooshing. Smoosh it until smooth, about one to two minutes. Then, take the dough out of the bag and knead it for another minute on a floured surface.


If your dough does not seem to be coming together while kneeding it, slowly add flour to all sides of the dough until it looks like this and it no longer sticks to your hands:


Put the finished dough into a greased loaf pan (or on a cookie sheet) and cover it loosely with plastic wrap.


Let it rise for about 30 minutes.


Then bake for
 35-40 minutes.


Slice it and serve with butter, cheese, or olive oil & balsamic vinegar!

Bon Appetite and Happy Bread Making!