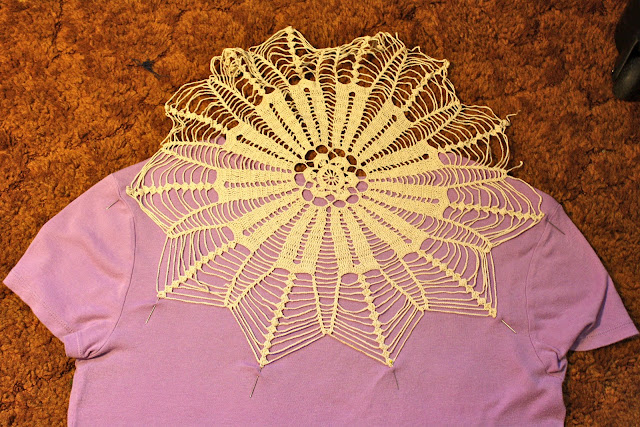
If you remember, a couple weeks ago I went thrifting and bought the sheet to make my DIY Bedsheet Curtains. Well I also bought this gorgeous doily!
To make this T-Shirt refashion, first get a doily like the one above and a frumpy old T-Shirt you dont care about.
 |
| See, super frumpy. So frumpy I had to squint my eyes so I wouldn't see the hideousness! |
Lay out your shirt on a flat surface face down.
Position the doily how you want it to look and pin it in place. I pinned mine so that half of the doily would be on the backside of the shirt, but if you wanted more doily you could always do two-thirds of it.
Then, flip the shirt inside out and cut out the back of the t-shirt from the collar to the doily edge being careful not to cut your stitches.
Flip your shirt so that the front is facing up and fold the doily over to the front.
Position it how you want it and then pin the doily to the shirt front.
Then sew the doily to the front just like you did on the backside.
Then, cut your doily directly in half across the neck of the shirt.
Then I cut the half circle out of the front of the doily.
These next few steps really depend on what you want your shirt to look like. I wanted some of the doily to rest on the shirt (as opposed to the backside which I cut out the entire shirt part where the doily was).
At this point I tried on the shirt to determine how much in the front I wanted to cut out.
I decided to first cut about an inch from the edge of the neckline from one shoulder to the other.
Then I decided I liked the way the doily looked on my bare shoulders so I cut to about a half inch from the edge of the sleeves.
I also knew I wanted a little dip in the front of the shirt so I went a little deeper directly in the center of the shirt.
And Voilà! A less frumpy and more fashionable shirt!
My adorable nephew agrees! Happy sewing!


No comments:
Post a Comment