Pages

Friday, June 29, 2012

Easy DIY Bedsheet Curtains


So I promise I havent forgotten about you all. I've actually had two blog posts photographed and almost written but I couldn't find my darn card reader to put the photos on the computer! (And I got distracted by a 1000 piece puzzle of the Sydney Opera House, but that's beside the point).


So my new room is great! Messy but great! The only thing is that I have this giant window through which the sun loves to grace me with its presence every morning around 6 am. 


See how bright it is!??!!


Ok, so maybe I overexposed the photo for dramatic effect.... It really looks more like this:


But still! That's a lot of light even with the blinds closed!


So I decided to make myself some curtains. And I didn't want to pay that much. So I went to my fave thrift store in Santa Cruz. I call it the Nifty Fifty (Zoë calls it the Fiddy) because there's a giant sign that says "50% OFF TODAY ONLY"  which is proudly displayed every day. 


So at the Fiddy I snabbed two things. 


The first was a pretty blue piece of fabric (I'm not sure what it actually was... it wasn't a bed sheet. maybe a table cloth? It had a weird piece of plastic on the bottom hem... I was really confused.) 


I also grabbed a cream colored doily which will be added to a T-shirt later on during the summer.


So here's how you make these easy DIY curtains!


First measure your window space. Mine was about 65 by 32 or something like that (I estimated)


Your sheet needs to be the same length but twice the height of what you want your curtains to be because our curtains are going to be double layered for extra sun protection! 


Lay out your sheet and cut it in half so that your curtains will be able to open in the center. Then hem the raw edge.
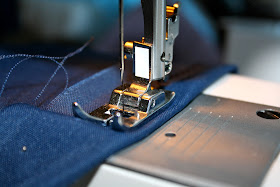


I LOVE this picture!


Then fold both halves from top to bottom with the wrong sides facing each other and the right sides on the outside. 


Now we're gonna make the pocket for the curtain rod (or curtain string)


I measured about 3.5 inches from the fold to put my pins in.


Then I used a zigzag stitch to make the seam for the pocket. 


Then thread the curtains onto your rod (or string), and that's all there is to it!


 Who's excited to be able to sleep in?? I AM!!!!

Sunday, June 24, 2012

Mini Omelet Cups


Basically I love to cook. Especially when I get to cook for my friends. Saturday for work we had our quarterly training (I'm a UCSC tour guide!). Since I knew that we would be up early for training, I wanted to bring my coworkers a little sunshine (because I knew that the only breakfast they would have were Costco muffins. And as delicious as they are, I wanted to do something special). So I created these little mini omelets! Aren't they cute?


Mini Omelet Cups (makes 24 Omelets)
Ingredients:

1/2 package of wonton wrappers (square or round, whatever you like)
1 dozen eggs
1 bell pepper, diced
1/2 medium onion (or 1 small onion) diced
1/2 package deli honey ham, diced (try to get the thick cut)
1/2 lb (1/2 package) shredded Mexican 4 cheese blend
Splash of Milk
Hot Sauce (optional) 
Cooking Spray
Salt/Pepper


First, preheat the oven to 350˚

Then spray your muffin tin with cooking spray and push one wonton wrapper into each muffin spot (is that what they're called? I don't know, but I'm calling them muffin spots)

You can use a cup to help push the wontons into the muffin spots!


Then, heat some oil in a sauté pan.

There, that was easy


Then, add the onions,


Sauté the onions for a few minutes until almost tender, then add the peppers,


Sauté for a few more minutes until onions are translucent (that means clear!)

Meanwhile, crack the eggs into a bowl and add salt, pepper, (dash of hot sauce), and a splash of milk (that's how you get them nice and fluffy!)


Then scramble them!


Once the the peppers and onions are done cooking, set aside half of them. Wouldn't want to exclude all the vegetarian tour guides!


Then add the chopped ham to the rest of the onions and peppers


Cook together until ham is golden brown and pretty!


Pour the onion/pepper mixture into half of the prepared muffin spots and pour the onion/pepper/ham into the other half of the muffin spots!


Then pour the egg mixture over the onion and peppers and top with some cheese!

Please ignore the missing omelet :)


Bake mini omelets for 13 minutes until the top bounces back. 


Then add another sprinkle of cheese to the top of the finished omelets! Hooray more cheese!


And enjoy!


Thursday, June 21, 2012

Braided Wedding Snuggle Blanket


My two lovely friends Ben & Amy got married last weekend and I was so excited because that meant I would be able to knit this beauty again! (And I was excited for them to get hitched!)


I knit this blanket any time I have friends who get married because its the perfect thing for newlyweds to snuggle under!


First of all get the thickest yarn you can find. And the largest needles you have (I used US size 36) You’ll need about 4 or 5 skeins worth (depending on how long you want it. You can always return the yarn or buy more). I used Cascade Magnum, because Cascade is one of my favorite brands and that’s what they have at my yarn store. However it is rather pricey. If you can find something cheaper, all the power to you! (I rationalize it because it is a wedding gift after all)


The color pictured here is 0010 (It had no name. I’m sure. My roommate Zoë looked.)
Also, make sure you wind it. There would be a big mess on my hands if I tried to knit it straight from the skein.


There. Much better.


First cast on 54 stitches (or however many you like really. As long as it’s a multiple of 9)

Rows 1-3: Knit

Row 4 (RS):K3, P3, *K6, P3 repeat from * until 3 stitches remain, K3

Row 5 (and all odd rows): K6, *P6, K3 repeat from * until 6 stitches remain, ending with K6


Row 6 is kind of tricky if you have never cable knit before

First K3, P3, *hold next 2 stitches to front on spare needle (or marker!), K2, knit both held  stitches, K2, P3, repeat from * until 3 stitches remain, K3


(after purling 3) Hold 2 stitches to front.


Knit next 2 stitches (while holding first 2)


Bring held stitches back


Knit both held stitches


Voila!


Row 8 is similar to row 6 but you hold the second set of stitches to the back


K3, P3, *K2, hold next 2 stitches to back on spare needle, K2, knit both held stitches, P3, repeat from * until 3 stitches remain, K3


(after purling 3 and knitting 2) Hold next two stitches to back.


(while holding stitches) knit next two stitches


Knit both held stitches


Voila!


Repeat rows 5-8 until desired length.
Knit three rows and bind off!


Mmmmmm cozy! You will probably cry as you wrap it because you're so sad that it is going to be enjoyed by someone else. Or maybe you just made it for yourself! In that case, Wahoo! You have a snuggly blanket to sleep with tonight!

Welcome!

Well hello there! Welcome to S. Pres, Oh! (read: espresso. Now isn't that clever? Props to Zoë, my friend and executive designer for S. Pres, Oh! for thinking that up)

As a recent graduate of UC Santa Cruz, I'm gonna have a lot of free time on my hands this summer. That's where S. Pres, Oh! comes in. To keep me occupied, and to keep you entertained!

S. Pres, Oh! will be a place for knitting, crafting, cooking and sewing by yours truly. I'm so pumped to be able to spread my love of all things creative with all you viewers out there. Stay tuned for amazing tutorials!


-Sarah

P.S

Here's a pretty picture of Zoë and I!

Hooray! We are SO happy!